
Good Morning Y'all,
I have a new project share for you this week using Sa Crafter's Chipboard baby dress album. Recently I have had a few friends that either have had babies or are pregnant and realized that this would be a great opportunity to sell baby banners at my next craft fair coming up next week. I decided not to place a name on there and decided that decorative brad would make this banner available for anyone who is about to have a baby or a decoration for a baby's nursery. The paper stack that I used for the dresses was DCWV's Vintage Collector stack and for the rosettes I used Colorbok Signature Homespun. Below are the steps of how I made my banner.

1. Painted front edges, sides and entire backs with white gesso, set aside to dry.
2. Pulled out my wooden baby embellies from Sa Crafter's. and painted with white gesso front and back.
3. Picked out color card stock from DCWV's paper stack and traced the dress on 5 sheets and then cut out and inked edges with Prima's chalk edger "Pink Blossom"
4. Turned the cardstock over and used my ScraPerfect Best Glue Ever and the small no clog tip to make a fine line along the edges of the paper and in then worked my way into the middle. I love using the tip because I don't have huge globs of glue being wasted. Then I adhere the papers to the chipboard dresses.
5. I smoothed the papers down and set aside.
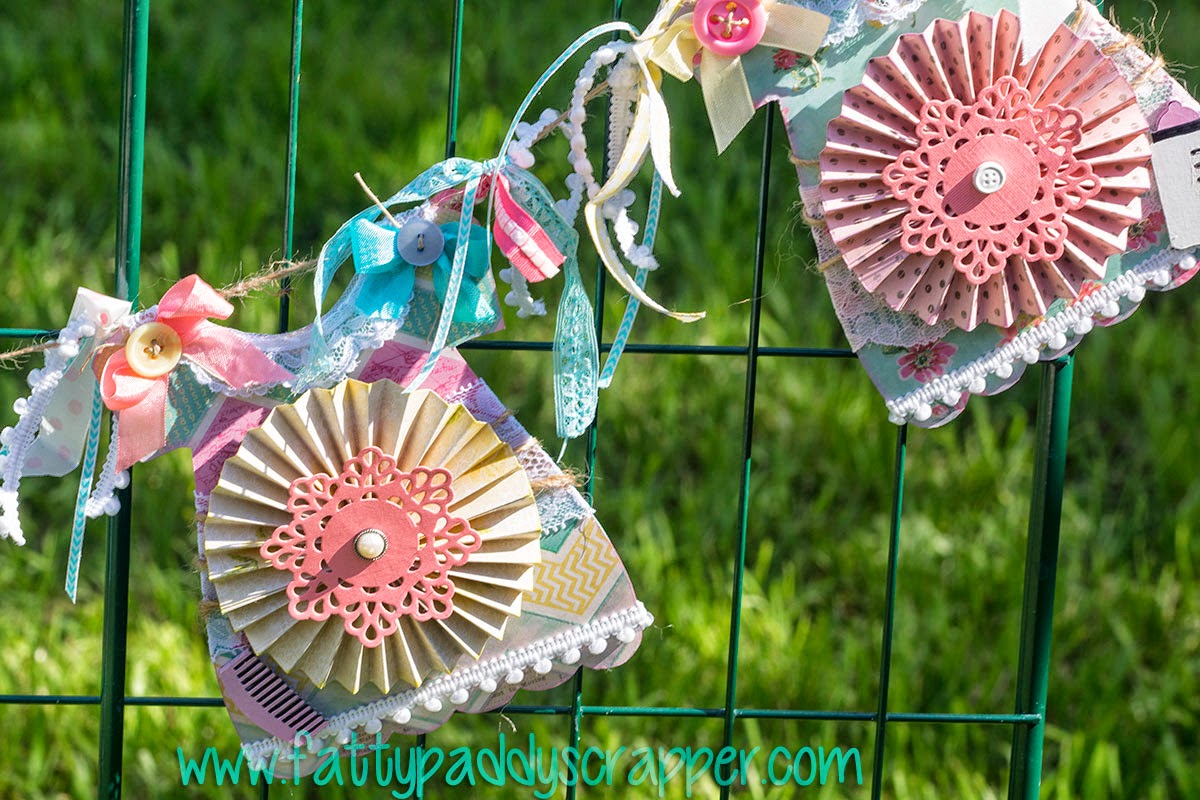
6. I grab my Signature Homespun stack and pull out two different pattern sheets and then use my score board and score at the 2 inch, 4",6",8",10" and then turn the paper one time so that the lines I just scored are now horizontal on my score board and then, every 3/4 inch I make a score line. This is so that I can create a fan effect.
7. Now I use my Cutting board and cut the two inch strips. Once that is done you can now use the small strips to create a fan, then I take two strips and attach the first end to the other with 1/8th inch score tape and then do the same to the other end. Now I gently push in all inner edges of my circle to the center to make the rosette, I add hot glue in the center and added my punch doily. I used sizzix Moroccan die with my side kick and cut out 5 with using a dark pink heavy cardstock. So while the glue is still hot I add that on top to the center and then push in a brad in the center of that.
8. After all rosette's are made I go back to the chipboard dresses and pull out some assorted laces that match in color, I then use my Best glue ever and make a small line in the center of the dress from left to right and add lace on top and smooth out and wrap it around and then use my glue gun for the edges to glue on the back.
10. We are almost done, this is optional but I wrapped twine around each dress three times and then tied in the back, then hot glued the rosette to the center of each dress.
11. I chose to paint Sa's wood embellies in matching colors to the papers but I think natural is just as beautiful so that is up to you and then hot glued one on each of the dresses.
12. I grabbed a roll of twine and laced through the eyelets but tied a knot and measure 4 inches from each dress and tied knots for every eyelet to keep the banner from sliding up and down the string and made it easy for the customer so they would not have to keep adjusting it and then I tied on an assortment of ribbons 2 for each side and then more pom pom string for each side.
13. Using seam binding ribbon I made a bow for each eyelet also and tied a button around the middle of the bow. Tied a loop at each end and Voila!! It's done.
I hope you love this project as much as I do and please feel free to ask any questions or just leave a little comment. I just love hearing from you!!
Thank you!!!
XOXOXO MUAAHHHH
~ Kimmy
Supply list:
SaCrafter's Store
Chipboard dress album
Baby embellies set-10 pcs.
ScraPerfect :
Best Glue Ever
No Clog Writing Cap
Twine, 12x12 paper stack or 8x8, decorative brads
White Gesso, Mint Green Acrylic paint,
Assortment of Ribbon and Seam binding ribbon
1/8th inch Score Tape
Discount Code: kimfans
Website/Blog: www.fattypaddyscrapper.com
Youtube:https://www.youtube.com/user/fattypaddyscrapper
Twitter: https://twitter.com/fattypaddyscra1
Pinterest: https://www.pinterest.com/FPSDesigns/fattypaddyscrapper-designs/
Google plus: https://plus.google.com/101128770875179309062/posts
No comments:
Post a Comment